Understanding the types of questions you might face in a machining practical exam can give you a significant edge in preparation. These exams often test both theoretical knowledge and hands-on skills, making it crucial to familiarize yourself with various problem formats.

From interpreting technical drawings to operating machinery safely, each question type challenges different aspects of your expertise. Getting comfortable with these formats not only boosts confidence but also enhances your practical abilities in real-world scenarios.
Let’s dive in and explore the details so you can approach your exam fully prepared!
Mastering the Interpretation of Technical Drawings
Decoding Symbols and Annotations
Understanding the various symbols and annotations on technical drawings is fundamental. These include surface finish marks, geometric tolerances, and weld symbols, each conveying critical manufacturing instructions.
From my experience, spending time familiarizing yourself with these notations prevents costly mistakes on the shop floor. For example, recognizing a concentricity symbol immediately tells you to maintain a specific alignment tolerance during machining, which can be tricky without prior practice.
It’s not just about memorizing; it’s about understanding what these symbols mean in practical terms so you can anticipate challenges before even starting the machine.
Dimensioning and Tolerance Interpretation
Dimensions paired with tolerances dictate the precision required for each part feature. I’ve found that many students underestimate how crucial it is to grasp both the size and allowable variation.
When a drawing specifies a diameter of 20mm ±0.05mm, that tiny tolerance window means your machining process must be dialed in perfectly. Ignoring these details can lead to parts that don’t fit or function correctly.
Practicing with real drawings and comparing your measurements against specified tolerances helps build a sharper eye and steadier hand.
Visualizing Finished Components
Sometimes drawings can be complex and challenging to visualize in 3D, especially when multiple views are presented. Developing the skill to mentally assemble these views into a single, complete part is invaluable.
I often recommend sketching the part or using CAD software if available to get a tangible sense of the final product. This mental rehearsal aids in planning machining sequences, choosing tools, and avoiding unnecessary setups.
Effective Tool Selection and Setup Techniques
Matching Tools to Material and Operation
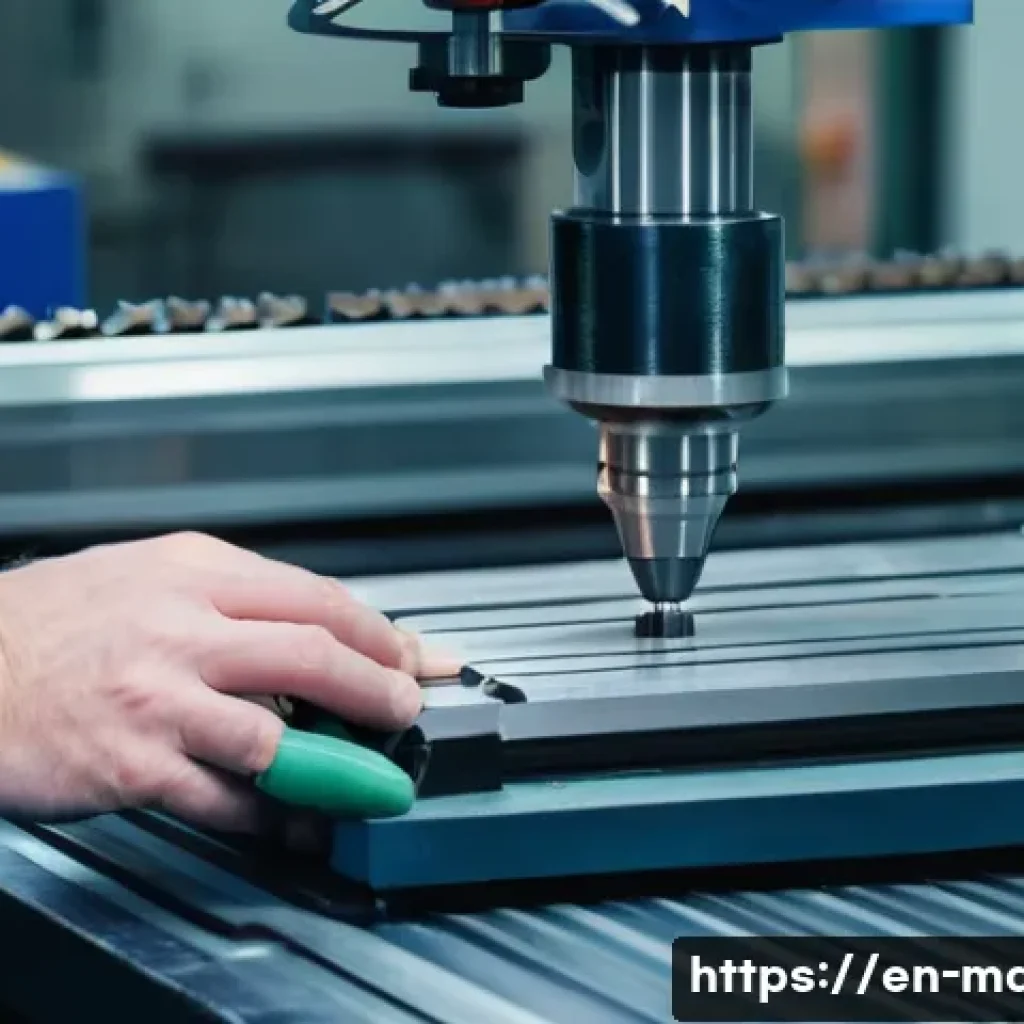
One of the first hurdles in practical machining exams is selecting the right tool for the job. From drills and end mills to turning tools, each is suited for specific materials and operations.
For example, carbide tools excel at high-speed machining of hardened steel, whereas high-speed steel tools are better for softer metals. I’ve learned through trial and error that understanding tool coatings and geometry can significantly affect surface finish and tool life, which is often tested indirectly through your machining results.
Setting Tool Offsets and Alignments
Proper tool setup ensures accuracy and repeatability. Setting tool offsets correctly in the machine’s control system, and aligning tools precisely with the workpiece, are tasks that require both patience and a steady hand.
During my own preparation, I realized that small mistakes here lead to dimensional errors downstream. Using dial indicators and test cuts before the actual operation can save a lot of headaches.
Maintaining Tool Condition During the Exam
Tools can dull or chip during machining, especially in longer practical exams. Monitoring tool condition and knowing when to change or re-sharpen is a subtle but vital skill.
I recall an exam where switching to a fresh tool midway prevented poor surface finish and dimensional inaccuracies, which ultimately saved my score.
Mastering Machine Operation and Safety Protocols
Safe Machine Startup and Shutdown Procedures
Every practical exam emphasizes safety alongside skill. Knowing how to correctly start and stop machines like lathes, milling machines, or CNC centers is fundamental.
This includes checking all guards, confirming emergency stops are functional, and wearing the appropriate personal protective equipment. From personal experience, rushing these steps often leads to minor errors or accidents, so establishing a calm, methodical routine is key.
Handling Unexpected Machine Behavior
Sometimes machines behave unpredictably due to tool chatter, material inconsistencies, or programming errors. Recognizing these issues early and responding appropriately—whether by adjusting speeds, feeds, or stopping the machine—is crucial.
In my exams, staying calm and troubleshooting rather than panicking made a big difference.
Adhering to Workplace Cleanliness and Organization
A neat workspace isn’t just about aesthetics; it’s about safety and efficiency. Keeping tools and materials organized helps prevent accidents and saves time.
I always make it a point to clean chips and debris regularly and to return tools to their designated spots, which examiners often appreciate and sometimes score indirectly.
Precision Measuring and Quality Control Methods
Using Micrometers and Calipers Accurately
Precision measurement tools like micrometers and calipers are exam staples. Learning to read these instruments correctly is essential for verifying part dimensions.
I’ve noticed that many students rush measurements, resulting in errors. Taking your time to zero the instrument, measure at the right points, and record values carefully pays off in accuracy and confidence.
Employing Surface Roughness Gauges
Surface finish quality can be a tricky aspect to assess. Surface roughness gauges provide quantitative data, helping you meet specified finish requirements.
When I first used these gauges, it was a bit overwhelming, but practicing on sample surfaces helped me interpret results and make necessary machining adjustments.
Documenting Inspection Results Clearly
Examiners often require you to record your measurements and observations. Clear, organized documentation reflects professionalism and thoroughness. I recommend preparing a checklist or template beforehand to avoid scrambling during the exam.
Planning and Executing Machining Operations Strategically
Sequencing Machining Steps Logically
Planning the order of operations is vital. For example, roughing passes should remove most material before finishing passes refine dimensions. During my preparation, I realized that an illogical sequence wastes time and increases the risk of errors.
Mapping out each step ensures smooth workflow and better quality.
Adapting to Material Behavior During Cutting
Different materials respond uniquely under cutting forces. Aluminum machines faster but can clog tools, while stainless steel demands slower speeds and more coolant.
I found it helpful to adjust feeds and speeds dynamically based on the feel and sound of the cutting process, which examiners respect as real-world savvy.

Time Management Under Exam Conditions
With limited exam time, balancing speed and precision is a challenge. Practicing timed runs helped me develop a rhythm where I wasn’t rushing but still finished all tasks comfortably.
Prioritizing critical dimensions and finishes ensures you score well even if time runs short.
Understanding Common Practical Exam Question Formats
Scenario-Based Problem Solving
Many exam questions present real-world scenarios requiring you to diagnose and fix issues, like a part out of tolerance or tool wear problems. Approaching these with a problem-solving mindset rather than rote answers shows your deeper understanding.
I remember an exam where explaining my reasoning for tool changes impressed the examiner more than just performing the task.
Hands-On Skill Demonstrations
These tasks test your ability to operate machines and produce parts to specification. Demonstrating smooth, confident machine handling and attention to detail often distinguishes top performers.
Practicing under conditions mimicking the exam environment helped me reduce anxiety and improve execution.
Written and Oral Explanations
Some exams include short written or verbal questions about procedures or troubleshooting steps. Being able to clearly articulate your process and safety considerations reinforces your expertise.
I practiced explaining my machining steps to peers, which boosted both my understanding and communication skills.
| Question Type | Key Focus | Preparation Tips |
|---|---|---|
| Technical Drawing Interpretation | Symbols, dimensions, 3D visualization | Study symbols, practice sketching, use CAD tools |
| Tool Selection and Setup | Tool choice, offsets, maintenance | Understand tool materials, practice setting offsets, monitor tool wear |
| Machine Operation and Safety | Startup/shutdown, troubleshooting, workspace organization | Learn safety protocols, simulate machine issues, maintain cleanliness |
| Precision Measurement | Micrometers, calipers, surface roughness | Practice reading instruments, document results accurately |
| Machining Planning | Operation sequencing, material behavior, time management | Plan workflows, adjust parameters, practice timed runs |
| Exam Question Formats | Scenario solving, skill demos, verbal/written responses | Engage in problem-solving, simulate exam tasks, rehearse explanations |
Developing Troubleshooting Instincts for Machining Challenges
Identifying Common Defects and Their Causes
Machining defects like chatter marks, burrs, or dimensional inaccuracies often signal underlying issues. Early in my training, I learned to correlate surface finish problems with tool wear or incorrect speeds.
This awareness helps you quickly pinpoint fixes during exams, saving valuable time and improving outcomes.
Adjusting Machine Parameters on the Fly
Sometimes, despite careful planning, you need to tweak speeds, feeds, or coolant flow mid-operation. I found that staying alert to changes in sound and vibration provides clues for these adjustments.
Being proactive rather than reactive demonstrates a high skill level.
Communicating Issues and Solutions Effectively
If an examiner asks why you made a particular adjustment, clear communication can boost your score. Explaining your thought process shows you understand not just the how, but the why behind machining decisions.
Practicing these explanations with instructors or peers builds confidence.
Building Confidence Through Simulated Practice
Recreating Exam Conditions
Simulating the timing, pressure, and environment of the actual exam helped me stay calm and focused. It’s one thing to perform tasks casually and quite another under timed scrutiny.
Setting up mock exams with peers or mentors gave me a realistic sense of pacing and workflow.
Reviewing and Learning From Mistakes
After each practice session, I made it a point to review errors thoroughly. Understanding why a part was out of tolerance or why a tool failed prevents repeating the same mistakes.
This reflection is key to continuous improvement.
Seeking Feedback and Mentorship
Getting input from experienced machinists or instructors provided insights I hadn’t considered. Their advice on technique, tool choice, or exam strategy was invaluable and often made the difference between average and excellent performance.
Conclusion
Mastering technical drawings and machining skills requires both knowledge and hands-on experience. Through consistent practice and attention to detail, you can build confidence and precision in your work. Remember, understanding the “why” behind each step makes a huge difference in achieving quality results. Stay patient, keep learning, and embrace challenges as opportunities to improve.
Useful Tips to Remember
1. Always take time to thoroughly understand symbols and annotations before starting any machining task.
2. Double-check tool setups and offsets to avoid costly dimensional errors during machining.
3. Maintain a clean and organized workspace to enhance safety and efficiency throughout your work.
4. Practice measuring tools carefully and document inspection results clearly to demonstrate professionalism.
5. Simulate exam conditions regularly to build confidence and improve your time management skills.
Key Takeaways
Successful machining hinges on interpreting technical drawings accurately, selecting and setting up tools properly, and following safety protocols without compromise. Developing a troubleshooting mindset and maintaining clear communication will elevate your performance. Above all, consistent practice under realistic conditions is essential to mastering both the technical and practical aspects of machining exams.
Frequently Asked Questions (FAQ) 📖
Q: What types of questions should I expect in a machining practical exam?
A: In a machining practical exam, you can expect a mix of theoretical and hands-on questions. These often include interpreting technical drawings, calculating dimensions, selecting the right tools, setting up and operating machines, and demonstrating safety procedures.
The goal is to test both your understanding of machining principles and your ability to apply them practically.
Q: How can I best prepare for interpreting technical drawings in the exam?
A: The key is to practice reading various types of engineering drawings regularly. Focus on understanding symbols, dimensions, tolerances, and material specifications.
Working with real or simulated blueprints helps you get comfortable with the details. I found that sketching out parts and explaining the drawings aloud boosted my confidence significantly during the exam.
Q: What safety aspects are typically assessed in a machining practical test?
A: Safety is a critical part of any machining exam. You’ll likely be tested on proper machine operation, use of personal protective equipment (PPE), emergency shutdown procedures, and maintaining a clean workspace.
Demonstrating awareness of potential hazards and following standard safety protocols shows your readiness to work responsibly in a machining environment.
From my experience, emphasizing safety not only protects you but also impresses examiners with your professionalism.